Introduction
Hello and Welcome to my first post on this very new blog.
Today I want to take a closer look at the setup of this blog. As my blog will grow, I will add new topics related to the setup of additional features which I am using here. First of all I want to discuss my motivation for starting a blog. Mainly this will be a platform to document and structure my thoughts and experiences in computer and data science with the added benefit, that my experience might help somebody else out there. So lets get started.
Set up
For this blog we will use github pages in combination with Jekyll. This offers two advantages. First, it is free and second, you can create your articles in markdown. So first you’ll need a github account. Then we will search for a template, so we don’t need to custom create everything and can get working on content quickly. Good sources i found, were:
- link jekyllthemes.io
- link jekyllthemes.org
- jamstackthemes
I chose this Theme for this blog. Once you have selected a theme, you’ll get to a github reposotory, where you can create a fork and create a copy of this repo in your personal gitspace and continue to work on it:
 Next you’ll need to choose a name for your repo. To use it as github page, the name will be “yourUserName.github.io”.
Since we don’t want to manage the content on git directly, we will pull the repo to a text editor. I like using Visual Studio Code. Now we can clone the repo to our computer with this link:
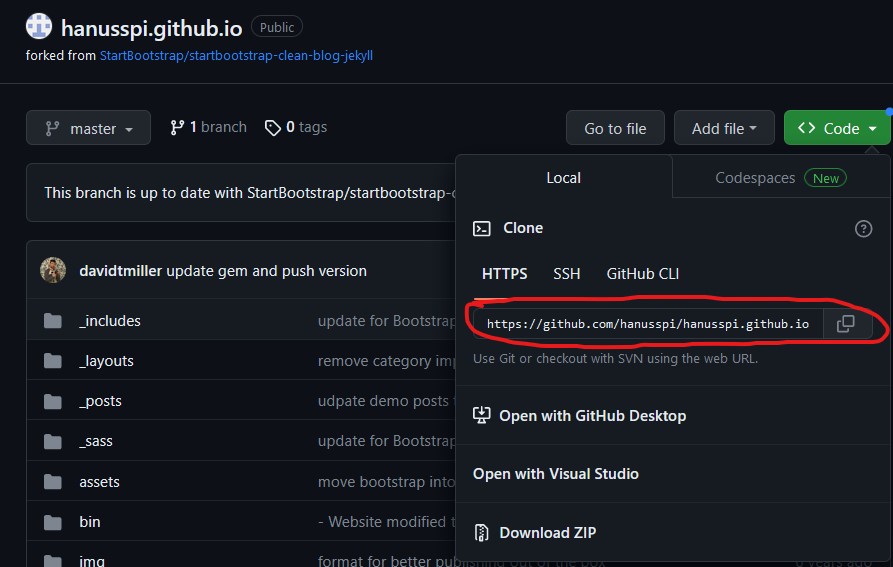
Now that we have managed this, we can start on customizing our Blog. Here we start by adding our Data to the “_config.yml” file by adding a title, description, name, url and so on. Also we need to install ruby. Now we can have a first testrun and launch the website localy, by running “bundle exec jekyll serve”. On your first run this will propably produce an error, that you can fix by running “bundle install”. This should enable you to check out the template under “localhost:4000”.
With this setup done, we are ready to start writing our first article. My template already came with a preconfigured posts folder and some example posts. To create a new article we create a file, following the syntax “YYYY-MM-DD-Your-Title.md” and add a header looking like this:
---
layout: post
title: "Setup a Blog wit Github Pages and Jekyll"
...
---
The Inforation required might vary with your template. Now we can simply write the blog post following the mark down syntax, which in my opinion is the greatest advantage of this framework, because it is super easy. One very good cheat sheet for mark down notation is markdownguide.
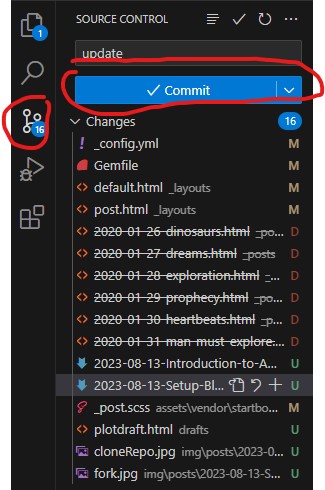
With this setup done, we can push our changes from the local machine to github. Using Visual Studio this is very easy. Simply commit your changes:
And sync your local repo with github (aka push the updates):
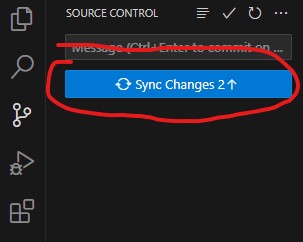
Now you need to wait for a few seconds and can check out the updates on github and get the link to your blog under settings->pages.
Congratulations. You just created your first blog and article.
Adding Formulas
Now lets add some formulas to the blog. For that, as any good student i want to use latex notation. And with the help of mathjax and adding a few simple lines of code at the bottom of the “default.html” layout
---
<script type="text/javascript" async src=>
</script>
---
And with this little addidion we can write Latexformulas in Markdown using only the “$” around the normal “$” signs of the default latex formula sytle. Turning $a=b+c$ into \(a=b+c\). And that is all there is to it.